Sunday, August 30, 2009

Can you splice a DVI-D single channel cable?


YES YOU CAN. WHEE. Yep, that mishapen lump is the splice in the DVI cable I did with just twisting wires and duct tape, and yes, that's the actual cable the monitor is running of. Ill call her Frankensplice.

Well, at some point I had to face splicing a monitor cable. I was going to use VGA, but i found a old DVI-D cable lying around. I never saw the difference in image quality so it ended up in the magical box of spare cables.

However, I decided to research the difference for this project (as the video card is DVI out and the LCD supports VGA and DVI input) and found one massive surprise: While I really couldn't see the difference in quality on the LCD (as I believe newer LCD's are very good at converting the analogue VGA signal) I did notice one thing: The scaling and repositioning of the screen was gone.

Under VGA, the screen has to detect where and how to fit the screen, resulting in it flickering on and off, changing in size and sliding around to fit. This was annoying on my test runs as it happened going into each game, and sometimes (5-10%) it wouldnt get it right and slide the screen a centimeter to the left, obscuring part of the screen.

DVI DOES NOT DO THAT. It displays the image crisp and clear, no flickering and always in the right position instantly. I didnt know this beforehand!

So it had to go in. Question was, was it possible to splice the cable without signal degredation? I have to fit the cable through a loom tube (just big enough for the cables between top and bottom), I certaintly couldnt get the connector through. Downside was, this cable is sheilded with tiwsted pairs, and removing these for a splice has a risk of interupting data, much like untwisting CAT-5 can make the cable less than optimal in use.

What was more fun: Not only did it look scary enough when I opened it up (four pairs of sheilded wire, with 5 lying speerate = 13 cables), but when I got into it i found a third uninsulated wire inside each of the four shielded pairs (4 times 3 + 5 = 17 cables!)

So I had a go as a trial run before the real deal next build time, and I got it right the first time without solder or heatshrink. All I did was twist the wires and insulate with duct tape. Little help sourced from this thread: http://www.avrfreaks.net/index.php?name=PNphpBB2&file=printview&t=44543&start=0.

Im going out tommorow to invest in some heatshrink and a small blowtorch for the real deal, which will be done with a lot more precision in care. This was just the test run, proof of concept to ensure I could actually do it.


Cable or a HL1 Headcrab? You decide.


Om Nom Nom Nom. Nearly set me back 30 mins work, thanks cat.


Halfway through, sheilded pairs done


Added some old dowel to help reduce mechanical force acting on join.

Thursday, August 27, 2009

Speaker Epic Deveat

The speakers I had installed seemed like epic win. They fit well and cranked out some tunes from my Ipod. Or so I thought.

It wasn't until later I unplugged my Ipod and plugged it into my PC. The noise. Oh the noise. I thought having it plugged into the running PC and into my Ipod was a good test. Apparently not. It had the most horrible line noise ever. So that USB speaker idea went in the bin after hours of trying to fix it. EPIC DEVEAT.

So I ended up going back to my old 2.0 powered speakers, which are working even better.

Deveat (Verb): Something that seems like complete fail, but has a hidden win.
Antonym(s): See VICTOLY


So Ive had to redo the speakers with a powered set. The sound quality is much improved, with NO LINE NOISE. Huzhaa.

Ive also completed the top wiring in terms of 240V power. I had to use a junction box and split of another mains for the powerpack for the new speakers.


Re-done speakers.

Testing the junction wiring

Looks safe

Completed wiring

Ive also done some work on the Jukebox side of things, and neatend up the playlist (also got something for all the album artwork)


EDIT: My first Bubble Bobble Million.

Monday, August 24, 2009

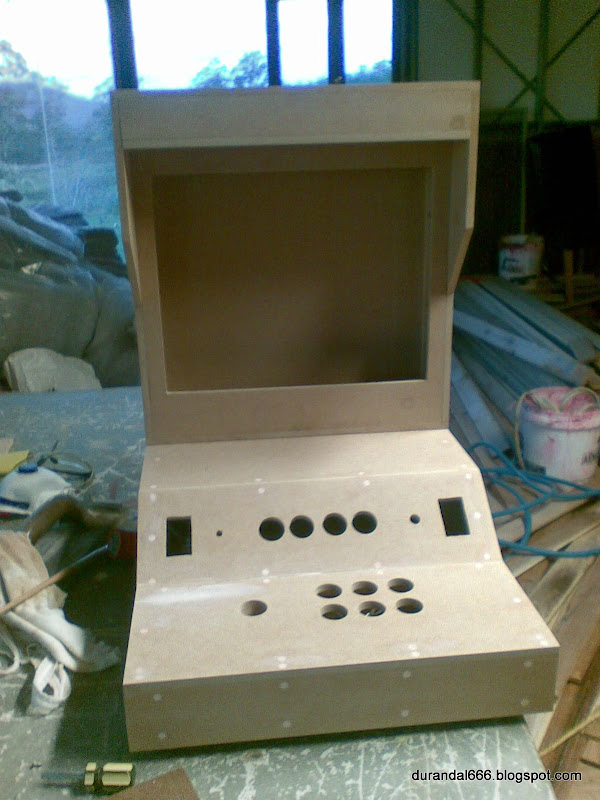
Day 5 (?) Casebuilding

I think Ive missed two days. Oh well.


Case sat together in its closed position


Case in the open position

Another day of work brought us to this. The top part is assembled, and just needs the speakers and LCD put in.

The word of the day was DREMEL. I used it a lot, for sanding out slots for the speakers and LCD, to cutting the mounting out of the speakers (As we couldnt just screw the speakers to the wood)

As for the speakers, I had to sand out some of the pine reinforcment to fit the speakers.


Speaker mount removed from casing

Hole cut and sanded out

Mounts glued in place with liquid nails

Speakers mounted


We also got the LCD fitted (but not mounted) at this point.


LCD from front


Dremel line where we had to sand back the pine to fit the LCD

Saturday, August 22, 2009

HIGHSCORE! Wait, whered it go?

Alright, long delay between updates as I havent had access to the WIP case. Between my mate going to QLD on business for two weeks, and upon his return going in for surgery, I have had little time to get out and work on the case. Since I have now spent two weeks only able to lie down and either watch Stargate or play Eternal Sonata on my PS3, I've gone half mad and decided to set up The Projects components in a old computer case and tinker with the software/hardware.

Ive picked myself up a Dremel 300 from Bunnings and a few extra bits for it from Jaycar, along with a peice of sheet steel from Bunnings. This will enable me to cut out some of the finer square holes/etc out of the sheet, which was posing a problem (cutting out 30mmx 25mm square out of 6mm sheet steel would be difficult with a standard tool) I shall do some work on this tomorrow (as tomorrow it is when I shall be next working on the case, wound or no wound)

Ive also done some work on the software, mainly MAME. Ok, so by 'Work' I mean playing Bobble Bubble for a while (and still only a maximum of level 32 on Easy starting with 5 lives). However, one thing I have done is re-enable High Score saving for games in MAME.

MAME's goal is to achieve 'perfect' emulation of cabinets, or as close to it as possible. Also, many MAME games did not save High Score tables. This is due to the original games not saving the high score in their firmware. Why? Because most arcade ops back then would have left them running for weeks or months on end, meaning that saving the high score table was not really a issue. This meant on power-down high scores were lost, and when you quit mame and start again its the same as a power-down. There is a autosave feature in MAME, but who wants to start up MAME and find themselves halfway through a game they rage-quitted?

MAME devs patched in a hack of saving high scores into MAME for a while (somewhere in the originals 0.60 -> 1.03 region from memory) but then removed it as it was causing more problems than good. Their goal was to recreate the original hardware, not add features.

Of course, someone had to add it back in for people like us. MKCHAMP over at the BYOAC forums was that person, who has released patches and compiles of newer MAME vers with the old highscore saver enabled. I found a highscore enabled MAME compile and matching highscore.dat file here (http://highscore.mameworld.info/)

Ive installed and tested it - works a treat for all the games ive tested (ok, ive only tested one, Bubble Bobble). Thanks guys!

Ive also got myself a very cheap pair of USB powered speakers for the box (http://www.jaycar.com.au/productView.asp?ID=XC5191&keywords=usb+speakers&form=KEYWORD) which should be excelnt for the box (Analogue volume control and no clunky transformer for power [The more expensive ones all had digital volume, which isnt what I want])